Home Blog Page 7

    How to Stop Runny Nose: 8 Best Remedies and Solutions

    0

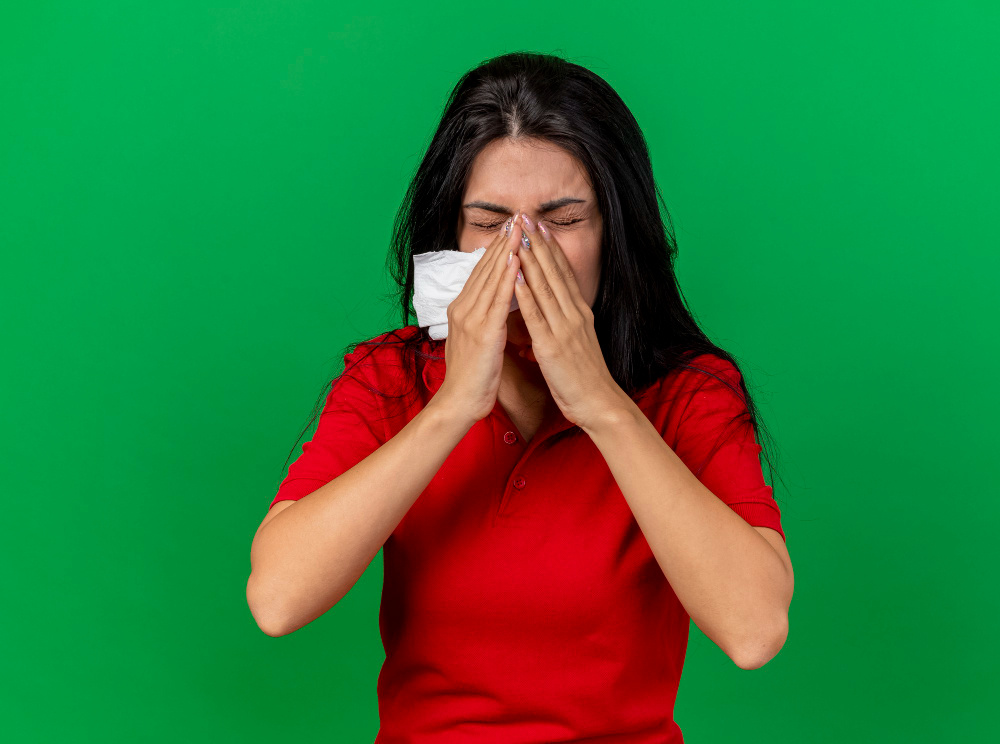
    A runny nose, also known as rhinorrhea, is a common symptom caused by excess mucus production which often lead people to wonder how to stop runny nose. It can be triggered by colds, allergies, irritants, or infections. While it’s not usually a serious health issue, dealing with a runny nose can be annoying and disruptive. Here, we’ll explore effective remedies on how to stop runny nose, both at home and medically, and answer frequently asked questions about this condition.

    Causes of Runny Nose

    1. Common Cold or Viral Infection

    The most common reason for a runny nose is the common cold. Any viral infection irritates nasal tissues, which then results in excess mucus.

    2. Allergies

    Allergic rhinitis causes a runny nose along with sneezing and itchy eyes, generally due to allergens such as pollen, dust, or pet dander.

    3. Irritants

    Irritant exposure to smoke, pollution, or strong odors may irritate the nasal passages, causing overproduction of mucus.

    4. Sinus Infections

    Sinus infections, or sinusitis, bring about inflammation in the sinuses, leading to a runny nose, congestion, and facial pressure.

    5. Weather Changes

    Cold, dry weather or sudden temperature changes may also cause a runny nose.

    6. Other Medical Conditions

    This runny nose may also be due to certain other medical conditions like nonallergic rhinitis, nasal polyps, or structural issues in the nasal passages.

    How to stop runny nose : home remedies

    1. Stay Hydrated

    If you are wondering how to stop runny nose , then Drinking plenty of fluids, thinning mucus to make it easier to expel. Warm liquids such as herbal teas, soups, or broths can be particularly soothing.

    2. Saline Nasal Spray

    Another effective way of how to stop runny nose is saline spray,Saline sprays will help moisturize and clean out nasal passages, flush irritants and allergens from the nostrils. Use a neti pot to rinse your nasal passages with saline solution.

    3. Steam Therapy

    Steam inhalation helps reduce nasal inflammation and loosen mucus for home remedies of how to stop runny nose. Fill a bowl with boiling water, lean over the bowl with a towel over your head, and breathe for 10 minutes. Use essential oils such as eucalyptus or peppermint to enhance effect.

    4. Rest and Elevate Head

    How to stop runny nose

    Getting enough sleep allows your body to recover. Sleeping on an elevated head also reduces nasal drainage and is less irritating to the throat.

    5. Humidifier

    Dry air can exacerbate nasal conditions. Use a humidifier for optimal humidity levels, especially during winter months.

    6. Warm and Spicy Foods

    Spicy foods like ginger, garlic, or chili peppers can temporarily relieve a runny nose by thinning mucus and promoting drainage.

    7. Honey and Ginger

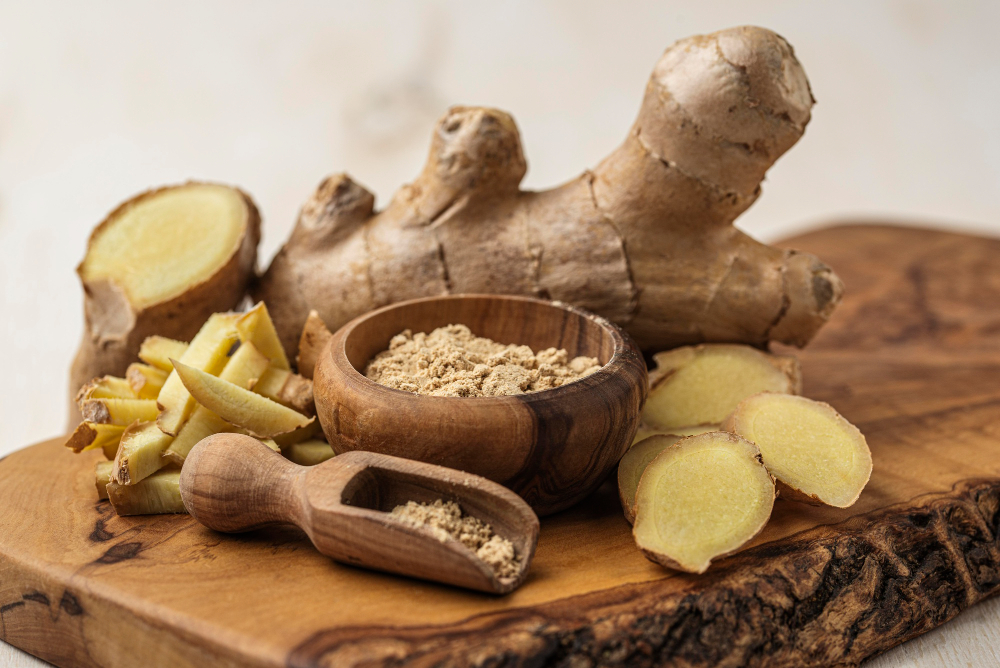
    A mixture of honey and ginger can soothe nasal irritation and boost immunity. Consume a teaspoon of this mixture a few times a day for relief.

    8. Avoid Triggers

    Identify and avoid irritants or allergens that could be causing your symptoms. Keep your surroundings clean and minimize exposure to dust or smoke.

    Over-the-Counter Remedies

    1. Antihistamines

    if your runny nose is caused by allergies, antihistamines like cetirizine, loratadine, or diphenhydramine can reduce symptoms by blocking histamine release.

    2. Decongestants

    Decongestant nasal sprays or oral medications such as pseudoephedrine can reduce swollen nasal tissues and decrease mucus production. However, nasal sprays should not be used for more than 3 consecutive days to avoid rebound congestion.

    3. Nasal Steroids

    For chronic nasal inflammation, nasal steroid sprays such as fluticasone or budesonide can decrease swelling and mucus production.

    4. Zinc Supplements

    Zinc lozenges or supplements can boost your immune system and may shorten the duration of a cold.

    When to See a Doctor

    A runny nose is often harmless and resolves on its own. However, seek medical attention if: – The symptoms last more than 10 days without improvement.- Mucus is thick, yellow or green, with facial pain; this is an indication of a sinus infection.- You have a high fever.- You have trouble breathing or significant swelling of the nose.- You feel that there may be a foreign object in the nose; this often occurs in children.

    Prevention Tips

    Maintain Good Hygiene: Frequently wash your hands to avoid contracting colds or infections.

    Boost Immunity: Have a balanced diet, work out, and get enough sleep to help strengthen your immune system.

    Use Protective Gear: Wear masks or avoid outdoor exposure when seasons of allergy or a polluted environment occur. Dress warmly during cold weather as that can irritate your nasal passages.

    Conclusion

    Running noses really are an irritating side, and these symptoms can be successfully and wisely managed with proper remediation and care. From simple home remedies on how to stop runny nose staying hydrated and using steam therapy to over-the-counter treatments like antihistamines, there are many ways to relieve nasal discomfort. It’s also essential to address the underlying cause, whether it’s allergies, a cold, or environmental factors. With the tips provided here, you’ll be better equipped to handle a runny nose and keep it from disrupting your daily life.

    FAQs on how to stop runny nose

    1. Can a runny nose be stopped instantly?

    Stopping a runny nose instantly is not always possible, but certain remedies on how to stop runny nose using a decongestant spray or antihistamines can provide quick relief. Steam inhalation and applying a warm compress can also reduce symptoms temporarily.

    2. Is a runny nose contagious?

    A runny nose that is viral in origin, such as the common cold or influenza, is contagious. However, a runny nose because of allergies or irritants is not contagious.

    3. Can diet help relieve a runny nose?

    The mucus can be thinned easily by warm and spicy food, and it aids easy drainage from the nasal side. Even more crucial is staying hydrated; having foods that are of nature as immune-boosters in them, such as oranges, garlic, or ginger.

    How to hand wash clothes: 6 Simple steps

    0

    how to hand wash clothes is a gentle and effective method for cleaning delicate fabrics, preserving garment quality, and extending their lifespan. This comprehensive guide on how to hand wash clothes will walk you through the process, provide tips for various fabric types, and answer common questions to ensure your hand-washing efforts are successful.

    How to hand wash clothes: Simple steps

    1. Understanding Fabric

    Check Care Label before starting how to hand wash clothes, it is important that the care label be studied. Symbols can be useful for knowing if the cloth has to be handwashed, what temperature is ideal for water, etc.

    2. Collection of Requirements

    For how to hand wash clothes, you will need Mild Detergent to clean delicate fabrics Basin or Sink cleaned free from residues Towels in preparation for drying. Drying Rack or Flat Surface,Lay garments flat to dry.

    3. Sorting and Preparing Garments

    Sort by Color: Keep light and dark items separated to avoid color transfer.- Turn Inside Out: This prevents stains from penetrating the outer fabric.

    4. Washing Process

    Fill the Basin: Use warm water if not indicated otherwise by the care label.

    Add Detergent: Dissolve a little bit of mild detergent in the water.- Soak Garments: Put the items in the water, making sure they’re saturated.-

    Agitate Gently: Gently swish the garments around to loosen dirt. Do not scrub or twist because it can damage the fibers.-

    Soak: Let the garments soak for up to 30 minutes for heavily soiled items.

    5. Rinsing

    Drain Soapy Water: Gently press out excess soapy water without wringing to avoid damaging.-

    Rinse Basin: Fill with fresh, clean water. Immerse in the clothes and swish around to work out laundry detergent.-

    Re-rinse if Still Soap- Laden: Re-rinse until totally free of soap residue.

    Read More: How to organize your closet by color: 8 Simple steps

    6. Drying the clothes

    Remove Extra Liquid: Fold garment on top of clean towel, wrap up into roll, press gently on the towel for moisture to seep off.-

    Shape Then Lay Flat: Allow your garment to air dry before laying flat on drying rack or lay flat on a clean, dry towel.-

    Steer Clear of Direct Sunlight and Heat: Drying in direct sunlight or near heat sources may cause shrinkage or fading.

    Tips for Specific Fabrics-

    Wool and Cashmere: Use cold water and a detergent meant for woolens. Do not agitate to avoid felting.-

    Silk: Use cool water and a mild detergent. Do not soak for more than a few minutes to avoid color fading.-

    Lingerie: Use lukewarm water and mild detergent. Fasten hooks to avoid snagging.

    Common Errors to Avoid

    How to hand wash clothes

    Overuse of Detergent: Too much detergent is hard to rinse out and can cause residue.-

    Wringer Garments: It stretches and breaks the fibers. Always gently press the water out.-

    Care Labels are Ignored: Always read the instructions from the manufacturer to avoid damage.

    Conclusion

    A skill that does help the quality and durability of clothes is hand washing. Thus, by following the steps provided and tips listed below, you can have the perfect delicate items with good care for years ahead.

    FAQs

    Are all clothes hand-washable?

    Not all clothes can be hand-washed. Clothes labeled “dry clean only” should be taken to a professional cleaner to avoid damaging them.

    How often should I hand-wash delicate items?

    Delicate items such as lingerie or silk garments should be washed after every 2-3 wears to maintain freshness and integrity of the fabric.

    Do I need to use special detergent for hand-washing?

    While not necessarily a required step, it does contribute to the care and conservation of your delicate items with a detergent created for fabrics that are tender.

    Septum Piercing: 5 things You Need to Know

    0

    Septum piercing has been one of the most sought-after piercings lately, mostly because of its unique look and cultural importance. Whether it’s for its edgy look or personal meaning, getting one requires a good understanding of the process, care, and possible concerns involved.

    What is a Septum Piercing?

    Septum Piercing

    A piercing is a form of body modification that involves a small hole between the cartilage and the base of your nose in the very thin tissue, known as the “sweet spot”. It’s not like most other nostril piercings, which go through actual cartilage, so it would be less painful and also heal much faster for many people. Septum piercings have a really deep cultural history, including in indigenous tribes, but they are often associated with status, rites of passage, or beauty.

    Read More: 16 Ear Piercing Names: Trending in 2024

    The Process

    1. Preparation

    A professional piercer will first clean and disinfect your nose to reduce the risk of infection. They’ll also mark the area to ensure proper placement. It’s important to ensure you go to a licensed professional who follows hygienic practices.

    2. Piercing

    The piercer will then pierce the septum with a sterilized needle through its “sweet spot.” Most people find this relatively painless and is quite quick. The jewelry will usually be a circular barbell or a captive bead ring, and it will go in immediately.

    3. Aftercare

    Proper aftercare is critical for preventing infections and ensuring smooth healing. It is advised that the piercing should be cleaned twice a day using saline solution or any cleaning solution that is safe for piercing. Avoid touching the jewelry with dirty hands and refrain from flipping it too many times since this will prolong healing time.

    Healing Time

    Septum piercings generally take 6-8 weeks to heal but may take up to 6 months for full recovery. Factors such as your immune system, aftercare routine, and the expertise of the piercer can influence healing time.

    Benefits of a this piercing

    1. Versatility

    This piercings can be easily hidden by flipping the jewelry upward into the nostrils, making it an appealing choice for those who want a piercing without it being too visible.

    2. Cultural and Personal Significance

    For some, a this piercing is more than just an aesthetic choice—it’s a connection to heritage or an expression of individuality.

    3. Trendsetting Appeal

    Popularized by celebrities and influencers, septum piercings offer a bold, edgy look that complements many styles.

    Risks and Precautions

    1. Infections

    Without proper care, the piercing site can become infected, causing redness, swelling, or discharge. Following aftercare instructions is essential.

    2. Pain and Discomfort

    Although the procedure takes but a few minutes, during healing, some people may feel sensitivity in the area.

    3. Reaction of Jewelry

    Allergies to some metals have been known to occur in a few people. Stainless surgical-grade steel or titanium should be used first to be on the safe side.

    4. Misplacement

    A poorly executed piercing may result in uneven jewelry placement, which can affect the appearance and cause discomfort.

    Choosing the Right Jewelry

    When selecting jewelry for your septum piercing, it’s important to consider both style and material. Popular options include:

    1. Circular Barbells The most common choice, offering a classic look.

    2. Captive Bead Rings Sleek and secure, suitable for those who are first-timers.

    3. Septum Clickers For those people who love details in ornamentation.

    4. Retainers In case the individual wants the piercing hidden when necessary

    Tips

    For new piercings, it’s best to use hypoallergenic material such as titanium, niobium, or surgical steel to avoid causing irritation and infection.

    1. Clean Regularly : Use saline solution twice a day to keep the piercing clean.

    2. Avoid Irritation : Do not twist or flip the jewelry frequently during the healing phase.

    3. Hands Off : Touching your piercing with dirty hands increases the risk of infection.

    4. Be Patient : Let your body heal for the right amount of time and do not remove the jewelry too early.

    5. Monitor for Infection Signs: If you experience excessive redness, swelling, or discharge, seek a professional piercer or a medical professional.

    Conclusion

    A septum piercing is a fashionable and symbolic form of self-expression that suits various personalities and lifestyles. Choosing a professional piercer, proper aftercare, and quality jewelry will all help you enjoy this trendy modification with minimal risks. Whether you seek to embrace cultural roots, want to make a statement, or just add a touch of uniqueness to your style, a septum piercing could be an exciting and rewarding option. Remember to be informed, care for your piercing well, and enjoy the process of integrating it into your identity.

    FAQs

    1. Does a septum piercing hurt?

    It hurts from person to person but is tolerable. It passes through the “sweet spot,” which is not cartilage but a thin membrane. It is thus not as painful as it seems. Most people describe it as a sharp pinch followed by mild soreness for a few days.

    2. Can I hide my septum piercing for work or school?

    Yes! One of the bigger advantages of a septum piercing is its flexibility. Using a horseshoe-shaped barbell allows for flipping the jewelry up through your nostrils to mostly hide it. There’s also retainers that were made for discretion purposes.

    3. What should I do when my septum piercing turns out to be infected?

    Do not try to remove the jewelry when you suspect infection since that might trap the bacteria within the piercing. Instead do: Clean the area using a saline solution twice in a dayAvoid unnecessary handling of or twisting of the jewelry.Consult a professional piercer or doctor when your symptoms persist; include when you experience severe redness, swelling, and/or pus.

    16 Ear Piercing Names: Trending in 2024

    0

    Ear piercings have been a popular form of self-expression for centuries, with various Ear Piercing Namesstyles and placements offering endless possibilities for customization. Each type of piercing has its unique Ear Piercing Names, location, and appeal, catering to different preferences and aesthetics. This article delves into the various ear piercing names, their placement, and important considerations for getting them.

    Types of Ear Piercing Names

    1. Lobe Piercing

    Lobe piercings are probably the most common and traditional of Ear Piercing Names. They are carried out on the fleshy part of the ear and tend to be easy to care for, healing relatively quickly.

    Healing Time: 6-8 weeks

    Jewelry Options: Studs, hoops, dangles

    Read More: Ear Piercing: Everything You Need to Know

    2. Upper Lobe Piercing

    This is located right above the standard lobe piercing. It is a very subtle extension of the traditional Ear Piercing Names and look , it can be paired with multiple lobe piercings for a stacked effect.

    Healing Time: 6-8 weeks

    Jewelry Options: Small studs or delicate hoops

    3. Helix Piercing

    The helix is located on the top cartilage of the ear. It is a popular style for anyone looking for something more than a lobe piercing. –

    Healing Time: 3-6 months

    Jewelry Options: Small hoops, studs, or barbells

    4. Forward Helix Piercing

    Ear piercing names

    This Ear Piercing Names is beautiful and can be performed as a single, double, or triple piercing located on the front part of the helix near the face.

    Healing Time: 3-6 months –

    Jewelry Options: Studs or small hoops

    5. Industrial Piercing

    This Ear Piercing Names is also known as a scaffold piercing. This involves two piercings on the upper cartilage connected by a single barbell. It’s bold and eye-catching.

    Healing Time: 6-12 months

    Jewelry Options: Long barbells

    6. Tragus Piercing

    The tragus is the small flap of cartilage in front of the ear canal. It is a subtle yet unique piercing.

    Healing Time: 3-6 months

    Jewelry Options: Small studs, hoops

    7. Anti-Tragus Piercing

    Located on the inner cartilage opposite the tragus, this piercing is not as common but just as fashionable.

    Healing Time: 6-12 months

    Jewelry Options: Studs or small hoops

    8. Daith Piercing

    Located on the innermost fold of the cartilage, the daith piercing is said to assist with migraines in some individuals. Its detailed positioning makes it unique.

    Healing Time: 6-12 months

    Jewelry Options: Small hoops, clicker rings

    9. Conch Piercing

    The conch is the large central part of the ear’s cartilage. There are two types:

    – Inner Conch: Pierced through the flat cartilage near the ear canal.

    – Outer Conch: Pierced closer to the edge of the ear.

    -Healing Time: 3-9 months- Jewelry Options: Studs, hoops

    10. Rook Piercing

    Located above the tragus on the cartilage ridge, this piercing looks edgy and trendy.

    Healing Time: 6-12 months

    Jewelry Options: Curved barbells, small hoops

    11. Snug Piercing

    Located in the middle cartilage of the ear, which is parallel to the rim, this piercing has modern appeal.

    Healing Time: 6-12 months

    Jewelry Options: Curved barbells

    12. Orbital Piercing

    This piercing is done on two different holes, but with a single piece of jewelry that links them, usually a ring. This is most common on the lobe or cartilage.

    Healing Time: 3-9 months

    Jewelry Options: Hoops

    13. Flat Piercing

    These piercings are found on the flat part of the upper ear cartilage and look sleek and contemporary.

    Healing Time: 3-6 months

    Jewelry Options: Flat-backed studs

    14. Transverse Lobe Piercing

    Unlike the usual lobe piercing, this one lies horizontal across the earlobe.

    Healing Time: 2-3 months

    Jewelry Options: Barbells

    15. Auricle Piercing

    This ear cartilage piercing lies just inside of the outer rim that exists between the helix and the lobe, a very subtle addition to adorn oneself with.

    Healing Time: 3-6 months

    Jewelry Options: Hoops, studs

    16. High Lobe Piercing

    It is a variation of the standard lobe piercing where it is performed higher on the fleshy part of the ear.

    Healing Time: 6-8 weeks

    Jewelry Options: Small studs

    Conclusion

    Ear Piercing Names offer limitless ways of expressing your personality and style. From the traditional lobe piercing to the intricate cartilage piercings, such as the daith or rook, there’s something for everyone. Every piercing has its healing time and care requirements, so be sure to follow professional advice for a smooth experience. Remember, choosing a reputable piercer and proper aftercare are the keys to enjoying your new ear accessory.Whether you’re looking for something bold like an industrial piercing or a subtle addition like an upper lobe, ear piercings are a timeless way to showcase your individuality.

    FAQs About Ear Piercing Names

    1. Which ear piercing is the least painful?

    Lobe piercings are generally the least painful because they are done on the soft, fleshy part of the ear. The cartilage piercings, like the helix or tragus, hurt a little more due to thicker tissue.

    2. How long does it take for ear piercings to heal?

    Healing times vary based on the type of piercing: – Lobe: 6-8 weeks- Cartilage: Helix, Tragus, Conch;

    3-12 months.

    3. Is it safe to have several ear piercings in one visit?

    Aye, but with a recommendation not to more than 2-3 piercings at the same time since this lessens the tension of healing. As always, check with your professional piercer.

    4. What do I need to do in caring for a fresh ear piercing?

    Clean the piercing with saline solution twice a day. Try not to touch the area with dirty hands, don’t sleep on it, or change the jewelry unless the piercing is completely healed.

    5. What do I do if my piercing becomes infected?

    Signs of infection are redness, swelling, and pus. Use saline solution for cleaning and do not remove jewelry; this will close it up. Seek a doctor or medical professional if the problem doesn’t go away.

    How to Get Rid of a Cold Sore in 24 Hours

    0

    Cold sores caused by the herpes simplex virus (HSV-1) can be painful and unsightly and leading for people to wonder How to Get Rid of a Cold Sore in 24 Hours. Completely thinking of How to Get Rid of a Cold Sore in 24 Hours is not possible, but various strategies can minimize its severity, alleviate discomfort, and increase the speed of healing. Here’s a comprehensive guide to managing cold sores effectively:

    Understanding Cold Sores

    Cold sores are fluid-filled blisters that normally appear around the lips or mouth. They go through phases; first, they develop as a tingling, then blistering, followed by weeping, crusting, and finally healing.

    How to Get Rid of a Cold Sore in 24 Hours : Tips

    a. Antiviral Creams

    Topical creams or ointments with over-the-counter or prescription antiviral medication like acyclovir or docosanol reduce viral replication and facilitate healing. Topical application of the creams as soon as the symptoms appear can also be applied to avoid such recurrence.

    b.Oral Antiviral Medication

    Antiviral pills prescribed in a doctor’s prescription may help to treat herpes outbreak very fast, like valacyclovir or famciclovir. It is effective when it is taken within a few hours of symptom onset.

    c. Ice Application

    Another trick of How to Get Rid of a Cold Sore in 24 Hours is Applying ice packs or cold compresses on the affected part may decrease inflammation, provide analgesia, and retard the multiplication of viruses.

    d. Lysine Supplements

    lysine is an amino acid required for humans, and its intake seems to reduce the incidence and severity of herpes. Lysine suppresses the action of arginine, an amino acid which the herpes simplex virus-1 utilizes to reproduce itself.

    e. Home Remedies

    • Aloe Vera Gel : helps soothe the infected skin and aid in healing process.-
    • Honey It’s an antiviral which can be applied directly over the sore.-
    • Dilluted Tea Tree Oil This may shorten the course of the sore if applied delicately.

    Preventing Further Spread

    Avoid touching the cold sore to prevent spreading the virus to other parts of your body.Do not share utensils, towels or lip products during an outbreak.- Apply sunscreen or a lip balm with SPF as the sun may cause flare-ups.

    Lifestyle Changes to Aid Recovery

    • Hydrate: Drink fluids to avoid dehydration.
    • Improve Your Immunity: Eat a diet rich in fruits, vegetables, and immune-enhancing foods.
    • Rest Properly: Resting is essential as it improves the body’s response to infections.

    Pain and Discomfort Management

    OTC pain relievers like ibuprofen or acetaminophen can alleviate pain.Topical numbing agents, such as lidocaine, provide temporary relief.

    When to Seek Medical Attention

    If cold sores are persistent, unusually large, or accompanied by fever, consult a healthcare professional. This is especially important for individuals with weakened immune systems.

    Conclusion

    By following these strategies and using available treatments, you can effectively manage cold sores and minimize their impact. Early intervention is key to achieving the best possible results.

    FAQ’S How to Get Rid of a Cold Sore in 24 Hours

    1. Can a cold sore heal in 24 hours?

    While unlikely to eliminate a cold sore within 24 hours, treatment with an antiviral cream or medications as soon as possible minimizes its length and intensity.

    2. What causes cold sore reoccurrences?

    Common contributing factors include stress, lack of sleep, sun exposure, hormonal fluctuations, or an immunosuppressed state.

    3. Are cold sores contagious?

    Yes, cold sores are highly contagious; they are especially contagious while oozing fluid; avoid touching when active.

    4. Can I pop a cold sore to speed up healing?

    No, popping a cold sore can spread the virus and increase the chance of infection, which may actually slow healing.

    5. How can I prevent cold sores?

    Preventive measures include managing stress, avoiding known triggers, and keeping an immune system in healthy function.

    How to Get Hair Dye Off Skin:7 Effective Method

    0

    Hair dye is that one thing that can totally transform your look, but sometimes, it just ends up staining the skin, leaving an unsightly mark and you to wonder how to get hair dye off skin. Whether you accidentally dyed your forehead, neck, ears, or hands while applying color, getting how to get hair dye off skin doesn’t have to be a daunting task. In this guide, we will explore various methods to effectively how to get hair dye off skin, along with tips on preventing stains in the first place.

    Why Does Hair Dye Stain the Skin?

    Hair dyes are made with chemicals that are extremely strong to dye not just hair but also skin. The biggest culprit usually remains the pigment or colorant, which clings onto the outer layer of skin, mainly if it has been applied for too long or was not removed as soon as possible. Even though such stains are never permanent, they can prove to be stubborn if not managed correctly.

    How to get hair dye off skin: Step-by-Step Instructions

    1. Soap and Water

    The easiest method of how to get hair dye off skin is using soap and water. It is most effective when the dye is still wet and has not dried out yet.

    How to Do It:

    When you first see the dye on your skin, wet a washcloth with warm water and apply a gentle soap. Gently rub the stained area in circular motions. Do not scrub too hard, as this may irritate the skin.

    Why It Works:

    Soap is effective in breaking down oils and pigments, so you can remove surface stains before they have a chance to set.

    Read More: How to Remove Dry Skin : 4 Effective Ways

    2. Rubbing Alcohol or Isopropyl Alcohol

    Another method of how to get hair dye off skin is Rubbing alcohol, Rubbing alcohol is stronger if soap and water will not get the stain off.

    How to Do It:

    Soak a cotton ball or pad with a little rubbing alcohol. Rub gently on the stained area using a circular motion with your fingers. Be cautious as it dries up your skin if overapplied.

    Why It Works:

    Alcohol is a solvent that can dissolve a lot of the ingredient makeup in hair dye especially color strong ingredients.

    3. Nail Polish Remover

    For tough stains how to get hair dye off skin use a nail polish remover-especially acetone-based-would work well.

    How to Do It:

    Dampen a cotton ball or swab with a small amount of nail polish remover and gently rub the stained area. After the stain is removed, wash the skin with soap and water to remove any remaining residue.

    Why It Works:

    Acetone is a strong solvent that breaks down the dye molecules, lifting the stain off the skin.

    4. Baking Soda and Dish Soap

    Baking soda mixed with a bit of dish soap can serve as a gentle abrasive that easily help with how to get hair dye off skin, but does not overly affect the skin.

    Procedure:

    Take one tablespoon of the dish soap and add it to two tablespoons of the baking soda. Use it as a paste in application to the stained area, scrubbing it round in circular motions. Remove all the stain by cleaning with warm water.

    Why It Works:

    Baking soda is a mild abrasive, and the dish soap helps to break down oils and pigments, so it is very effective at lifting stains.

    5. Olive Oil or Coconut Oil

     How to get hair dye off skin,

    if you want a more natural remedy for how to get hair dye off skin, oils such as olive or coconut oil can help loosen the dye from the skin.

    How to Do It:

    Apply a small amount of oil to a cotton ball or your fingers, then gently massage the oil into the stained area. After a minute or two, use a clean cloth to wipe off the dye.

    Why It Works:

    Oils can help dissolve the hair dye pigments, making it easier to remove the stain without causing irritation.

    6. Toothpaste

    Hair Dye

    Toothpaste, particularly those with a bit of grit (like whitening toothpaste), can work as a gentle exfoliator to scrub away dye stains.

    How to Do It:

    Apply a small amount of toothpaste to the stained area. Use a soft toothbrush or your fingers to gently scrub the area. Afterward, rinse with warm water.

    Why It Works:

    The fine abrasives in toothpaste help smoothen out the exfoliation on the skin, removing the dye in a non irritated manner.

    7. Vinegar and Baking Soda

    Vinegar combined with baking soda can also be a good combination and helps lift the stains effectively without damaging the skin.

    How to Do It:

    Mix equal parts of vinegar and water, then apply the solution to the stain using a cotton ball. For extra scrubbing power, sprinkle a little baking soda over the stain and gently rub it with a cloth or your fingers.

    Why It Works:

    Vinegar’s acidity helps to break down the dye molecules, and baking soda’s abrasiveness helps lift the stain from the skin.

    How to Avoid Hair Dye Stains

    • While there are many good ways to how to get hair dye off skin, it’s always easier to prevent staining in the first place. Here’s how:
    • Use Petroleum Jelly: Before applying hair dye, apply a thin layer of petroleum jelly or a thick moisturizer along your hairline and on your ears. This will create a barrier that prevents the dye from sticking to your skin.
    • Wear Gloves: Always wear gloves when applying hair dye to avoid getting it on your hands and fingers.
    • Act fast : if accidentally you get the dye stain on your skin, use a tissue or cloth for immediate wiping off. You will be easier to wipe off if you act earlier.
    • Use barrier creams such as Vaseline: Using specialized barrier creams or even vaseline around the borders of your hairline should prevent staining.
    • Use a Dyeing Brush: A professional dyeing brush can be helpful in applying the dye with precision, which decreases the chances of mess.

    Conclusion

    Getting hair dye off the skin doesn’t have to be a frustrating experience. Whether you use common household items such as soap and water or try something more specific, like rubbing alcohol or nail polish remover, there are many methods to choose from. By acting quickly and using the right technique, you can remove hair dye stains with minimal effort. If you want to prevent staining in the first place, take some precautionary steps like using a protective barrier around your hairline and wearing gloves during the dyeing process. With these tips, you can confidently change your hair color without worrying about unwanted stains.

    FAQs

    1. How do I get hair dye off my skin as fast as possible?

    The fastest method to dissolve hair dye on skin is to use rubbing alcohol or nail polish remover. Both of the products dissolve the dye easily, so you can then wipe it away in just a few minutes. Of course, follow up the removal process with soap and water to remove any excess residue and prevent irritation from occurring on your skin.

    2. Can I remove hair dye from my skin using bleach?

    It might bleach hair colour but it’s very harsh and will likely cause very strong irritation or burns if it gets onto your skin. Use a milder method such as soap and water, olive oil or rubbing alcohol for removing.

    3. Does hair colour usually stain skin?

    Yes, it is normal for hair dye to temporarily stain the skin, especially if the dye is not wiped off immediately or if it comes into contact with areas like the forehead, neck, or ears. However, with the right techniques and products, these stains can usually be removed within a few hours or days.

    10 Must Wardrobe malfunctions to avoid in 2024

    0

    Wardrobe malfunctions are every individual’s nightmare, especially during important events or in professional settings. A minor mishap can not only ruin your appearance but also leave you feeling embarrassed and self-conscious. Fortunately, most wardrobe malfunctions are entirely preventable with a little preparation and attention to detail. Here’s a guide to the ten most common wardrobe malfunctions and how to avoid them.

    Must to avoid wardrobe malfunction in 2024

    1. Visible Undergarments

    The most common one is, the undergarments would show due to a strap slipping off one’s bra or sometimes can be noticed through their outfits due to panty lines. These usually are mostly due to ill-fitting or improper undergarment selection according to certain apparel.

    Solution:

    Just invest in seamless underwears and strapless, convertible bras that support every outfit. Do a second round of check in front of the mirror before moving.

    2. Broken Zippers

    Nothing is more frustrating than a zipper that won’t budge or breaks when you’re in a rush. A malfunctioning zipper can leave you struggling to fix your outfit last minute.

    Solution:

    Always inspect zippers before wearing the outfit. For emergencies, keep a travel sewing kit or safety pins handy. Consider replacing faulty zippers with sturdier ones.

    Read More: How to organize your closet by color: 8 Simple steps

    3. Clothing Tears

    Tears in clothing, particularly along seams, are normal if the garment is too tight or poorly stitched. This is particularly problematic with older or heavily worn outfits.

    Solution:

    Avoid very tight clothing and check seams regularly for wear and tear. Carry a mini sewing kit for quick fixes.

    4. Falling Straps

    Loose straps on tops or dresses can be very distracting and embarrassing, especially for formal events.

    Solution:

    The straps should be adjusted before putting on the outfit and even strap clips or fashion tape can be used to ensure it.

    5. Sheer Clothing Mistakes

    Wearing sheer clothing without proper layering can make one appear to be more revealing than they intended, as some areas may not be fully covered.

    Solution:

    Check the sheer appearance in various lights, layer sheer outfit with slips or camisoles, and opt for undergarments that are close to neutral color.

    6. Hemlines Getting Stuck

    Hemlines will keep rising in the case of skirts or dresses. Such discomfort and embarrassment can prove a constant. This mostly happens because of static cling or improper-fitting clothing.

    Solution:

    Use anti-static sprays or wear anti-static slips underneath. For pencil skirts, make sure they fit nicely around your hips.

    7. Missing Buttons

    A missing button can throw the entire look of your outfit out of balance, leaving it looking unkempt and incomplete.

    Solution:

    Check your clothing for unbuttoned buttons and sew them back up before putting the garment on. Carry a stash of extra buttons and spools of thread with you to address problems in the moment.

    8. Wardrobe Malfunctions When Moving Around

    Clothing falling out of place as you sit, bend or walk can create unwanted wardrobe malfunctions. Low-riders, off-shoulder tops, and mini skirts are the primary offenders.

    Solution:

    Test your outfit in various positions before leaving. Wear high-waisted undergarments with low-rise pants and ensure off-shoulder tops have elastic that holds well.

    9. Shoe Issues

    Blisters, broken heels, or straps snapping at inconvenient times can disrupt your entire day.

    Solution:

    Break in new shoes before wearing them for long periods. Carry extra insoles, blister pads, and super glue for quick repairs.

    10. Stains and Deodorant Marks

    Stains, especially from food, drinks, or deodorants, can spoil the most beautiful outfit.

    Solution:

    Apply deodorant and let it dry before dressing. Carry a stain remover pen for emergencies and avoid eating or drinking carelessly in formal wear.

    Tips to Prevent Wardrobe Malfunctions

    Wardrobe malfunctions
    • 1. Plan Ahead: Try on outfits before an event to ensure perfect fit functionality and prevent last-minute alterations and damage.
    • 2. Right Fabrics: Use durable, well-stitched garments that hold out under stress.
    • 3. Emergency Supplies: Fashion tape, safety pins, stain removers, and sewing kits can always save the day.
    • 4. invest in Quality Clothing: High-quality garments are less likely to have stitching, fabric, or zipper issues.

    Conclusion

    Wardrobe malfunctions can happen to anyone, but with a little foresight and preparation, they can often be avoided. By understanding the common issues and taking preventive measures, you can confidently step out without worrying about mishaps. Whether it’s a work

    FAQs About Wardrobe Malfunctions

    1. How can I prevent wardrobe malfunctions at work?

    To avoid wardrobe malfunctions at work, choose well-fitted, professional attire made of non-sheer, durable fabrics. Test your outfit for functionality by sitting and walking in it beforehand. Keep a blazer or scarf handy for quick coverage if needed.

    2. What should I do if my outfit malfunctions in public?

    Be calm and discreetly manage the situation. You may use fashion tape, safety pins, or even a scarf to manage the situation temporarily. If possible, excuse yourself to fix the issue in a restroom.

    3. What can I do to make sure my formal attire do not malfunction at events?

    Double-check outfit fit, functionality, and problem areas prior to event. Layer sheer clothing. Secure straps. Carry supplies of safety pins and tape in case something needs fixing on the go.

    Sleep Deprivation Psychosis: Understanding Its 4 Causes, Effects, and Solutions

    0

    Sleep is a fundamental biological need, as essential as food and water. Yet, in our fast-paced world, it’s often the first thing we sacrifice. Chronic lack of sleep can lead to severe mental and physical health issues including serious sleep deprivation psychosis, This article explores what sleep deprivation psychosis is, its causes, symptoms, and potential solutions to prevent or address it.

    What is sleep deprivation psychosis

    It can simply be described as sleep deprivation where the brain functionality is significantly impaired due to prolonged lack of sleep in a person, causing symptoms such as disorientation and delusions. It is, however, a rare side effect of extreme sleep deprivation psychosis, which usually occurs beyond 48-72 hours of wakefulness. By this time, the brains lose their ability to rationalize reality, and the patient starts seeing things that occur in their imagination.

    Read More: Kussmaul Breathing: A Important Clinical Understanding

    Causes of Sleep Deprivation Psychosis

    The primary cause of sleep psychosis is extended periods of wakefulness, but there are several factors that exacerbate the condition:

    • 1. Chronic Stress: A state of chronic stress can alter the sleep pattern and thus leads to severe sleep loss.
    • 2. Underlying Mental Health Conditions: There are mental health conditions like bipolar disorder or schizophrenia, which increase susceptibility.
    • 3. Substance Abuse: Alcohol, drugs, or stimulants can disrupt normal sleep patterns, increasing the severity of symptoms.
    • 4. Shift Work or Irregular Sleep Schedules: Those whose sleep patterns are irregular are at a greater risk of sleep deprivation and its extreme effects.

    Symptoms of Sleep Deprivation Psychosis

    The symptoms of sleep deprivation psychosis vary according to the intensity and length of sleep deprivation but may include:-

    • Cognitive Impairment: Inability to concentrate, memory loss, and confusion. –
    • Hallucinations: Seeing, hearing, or sensing things that are not real.
    • Paranoia and Delusions: Irrational fears or beliefs.
    • Emotional Instability: Irritability, anxiety, and mood swings.
    • Physical Symptoms: Slurred speech, tremors, and a weakened immune system.

    Impact on Physical and Mental Health

    Sleep Deprivation Psychosis

    The implications of sleep deprivation psychosis reach beyond the immediate symptoms. Prolonged sleep deprivation can lead to chronic conditions such as heart disease, diabetes, and obesity. It can worsen mental illnesses like depression, anxiety, and PTSD.

    Prevention and Treatment

    Prevention of sleep deprivation psychosis requires maintaining healthy sleep practices and resolving the underlying problem:

    • 1. Maintain Good Sleep Hygiene:Try to maintain a routine sleep schedule, create a soothing pre-sleep time, and avoid screens before sleeping.
    • 2. Stress Management: Practice relaxation techniques, such as meditation, deep breathing, or yoga, to help relax and thus improve sleep quality.
    • 3. Seek Professional Help: In case insomnia or other sleep disorders do not resolve on their own, consult with a medical professional.
    • 4. Avoid Stimulants: Decrease intake of caffeine and alcohol, especially at night.
    • 5. Treatment Programs: In extreme cases, the individual may require CBT-I or medication.

    When to Get Emergency Care

    A person who is experiencing psychosis, hallucinations, delusions, or severe confusion should be taken to a hospital immediately. Sleep deprivation psychosis can be fatal if not treated.

    Conclusion

    Sleep deprivation psychosis underscores the importance of sleep as the cornerstone of mental and physical health. The symptoms have to be recognized early enough and addressed proactively to avoid severe consequences. Sleep has to be prioritized-not a luxury but a necessity for a healthy, balanced life.

    FAQs

    1. Can sleep deprivation psychosis heal on its own?

    Yes, but only mild cases can heal on their own with good sleep. However, severe cases need medical attention to help identify underlying causes and properly manage the symptoms.

    2. How long does it take to get over sleep deprivation psychosis?

    Recovery is in proportion to the degree to which sleep is lost. Recovery of cognitive function can occur typically within a few days; however, in severe cases it may take weeks and professionally.

    3. Is sleep deprivation psychosis permanent?

    No, sleep deprivation psychosis is not usually permanent. Most people recover fully with proper sleep and treatment. However, chronic sleep deprivation can lead to long-term mental and physical health issues.

    4. How long does it take before sleep deprivation psychosis?

    Sleep deprivation psychosis is very unusual after just one night. While one sleepless night can impair concentration and mood, sleep deprivation psychosis generally occurs after 48-72 hours of continuous wakefulness. However, persons who have a history of a mental illness may exhibit the symptoms sooner.

    5. Is there a group of people more at risk of sleep deprivation psychosis?

    Yes, some are more vulnerable, such as shift workers, people with insomnia or sleep disorders, individuals with high-stress jobs, people with mental health problems, and those who abuse stimulants or alcohol.

    6. Can naps prevent sleep deprivation psychosis?

    Short naps, ranging from 20 to 30 minutes, can be beneficial in reversing some effects of sleep deprivation and thus, for a short period, help a person regain alertness. Nevertheless, it cannot replace the restorative sleep cycle and especially prevent extreme states like psychosis.

    7. How is sleep deprivation psychosis diagnosed?

    Health care experts diagnose sleep deprivation psychosis considering an extensive assessment of sleep history, symptoms, and the patient’s mental state. Polysomnography or sleep studies help identify the underlying sleep disorders

    8. Are there other natural ways to enhance one’s sleep and prevent the psychosis?

    Yes, of course, natural remedies include melatonin supplements, chamomile tea, lavender aromatherapy, and mindfulness meditation, which can indeed help improve sleep quality, but these should complement medical advice if symptoms of psychosis appear.

    6 Healthy Upma recipe: Start your healthy lifestyle today

    0

    upma recipe is a traditional South Indian breakfast, so popular worldwide because of its ease in preparation, versatility, and nutritional value. Traditionally made with semolina, or rava, this dish is quite easy to prepare and can be altered with a number of different ingredients to suit your personal taste and health requirements. By incorporating healthier alternatives and nutrient-rich ingredients, upma recipe can become a powerhouse meal to kick-start your day. Here, we explore six healthy and delicious upma recipe that you can easily make at home.

    6 Simple and healthy Upma recipe

    1. Vegetable Rava Upma

    This is the classic version of upma recipe, enhanced with an abundance of colorful vegetables to boost its nutritional value.

    Ingredients:

    • 1 cup semolina (rava)-
    • 2 cups water –
    • 1 tablespoon oil or ghee –
    • 1 teaspoon mustard seeds –
    • 1 teaspoon cumin seeds –
    • 1 green chili, chopped –
    • 1-inch piece ginger, grated –
    • 1 medium onion, finely chopped – Mixed vegetables (carrot, beans, peas, capsicum) –
    • 1 cup – Curry leaves and coriander leaves for garnish –
    • Salt to taste

    Preparation:

    • 1. Roast the semolina in a dry pan until it turns slightly golden and aromatic. Set aside.
    • 2. Heat oil or ghee in a pan. Add mustard seeds and cumin seeds and let them crackle.
    • 3. Sauté onions, green chilies, and ginger until translucent.
    • 4. Add the mixed vegetables and cook for 5–7 minutes until soft.
    • 5. Add water, salt, and bring it to a boil.
    • 6. Gradually add the roasted semolina and keep stirring continuously so that no lumps are formed.
    • 7. Cook until the upma thickens. Garnish with curry leaves and fresh coriander.

    Why It’s Healthy:

    Vegetables provide essential vitamins and fiber, making this a wholesome meal. You can also use less oil to keep it low-calorie.

    2.Quinoa Upma

    To include another gluten-free and packed meal, quinoa itself proves as a great base.

    Ingredients:

    • 1 cup quinoa.
    • 2 cups of water.
    • Oil-a dash.
    • Tea spoon mustard seeds and half teaspoon urad.
    • One medium onion –
    • One green chili
    • A few sprigs of chopped spinach or kale
    • Curry leaves
    • Salt and lemon juice as per taste

    Preparation:

    • 1. Rinse quinoa and cook it in 2 cups of water. Keep it aside.
    • 2. Heat oil in a pan. Add mustard seeds and urad dal. Let them splutter.
    • 3. Sauté onions, green chilies, and curry leaves until they are soft.
    • 4. Add spinach or kale and cook until wilted.
    • 5. Mix in the cooked quinoa.
    • Add salt to taste and a squeeze of lemon juice for a tangy taste.

    Why It’s Healthy:

    Quinoa is high in protein, fiber, and essential amino acids, making it a nutritious choice for a hearty breakfast

    3. Millet Upma

    Millets like foxtail, finger, or pearl millet can be used to create a nutritious and satisfying upma recipe.

    Ingredients:

    • -1 cup millet of your choice
    • 2 cups water –
    • 1 tablespoon oil –
    • 1 teaspoon mustard seeds –
    • 1 teaspoon chana dal –
    • 1 medium tomato, finely chopped –
    • 1 green chili, chopped-
    • A few fresh mint or coriander leaves
    • Salt and turmeric powder to taste

    Preparation:

    • 1. Wash the millet and cook with water until soft.
    • 2. Heat oil in a pan by adding mustard seeds and chana dal.
    • 3. Add tomatoes, green chilies, and turmeric powder for the tomatoes to become soft.
    • 4. Add the cooked millet and mix well. Garnish with mint or coriander leaves.

    Why It’s Healthy:

    Millets are gluten-free and rich in fiber, antioxidants, and essential minerals, making this dish a heart-friendly and diabetic-friendly

    4. Oats Upma

    Oats upma recipe is a great choice for those looking to add whole grains to their diet. Ingredients:

    Ingredients:-

    • 1 cup rolled oats –
    • 1 ½ cups water –
    • 1 tablespoon oil –
    • 1 teaspoon mustard seeds –
    • 1 teaspoon curry leaves –
    • 1 medium carrot, grated –
    • 1 small capsicum, chopped –
    • 1 teaspoon grated ginger –
    • Salt and pepper to taste

    Preparation:

    • 1. Dry roast oats for 2–3 minutes and keep aside.
    • 2. Heat oil in a pan and add mustard seeds and curry leaves.
    • 3. Sauté ginger and vegetables until tender.
    • 4. Add water, salt, and pepper. Once the water begins to boil, slowly add the oats while stirring.
    • 5. Cook for 3–5 minutes until the oats absorb the water and thicken.

    Why It’s Healthy:

    Oats are a great source of soluble fiber, which aids in digestion and helps lower cholesterol levels.

    5. Sprouted Moong Dal Upma

    Adding sprouted moong dal makes your upma recipe protein-rich and ideal for post-workout meals.

    Ingredients:

    • – 1 cup semolina (rava) or quinoa –
    • ½ cup sprouted moong dal –
    • 1 tablespoon oil – 1 teaspoon mustard seeds-
    • 1 medium onion, chopped-
    • 1 small tomato, chopped-
    • A pinch of asafoetida (hing)-
    • Salt and turmeric powder according to taste

    Preparation:

    • 1. Cook the sprouted moong dal till soft. Keep it aside.
    • 2. Roast the semolina or quinoa in a dry pan and keep it aside.
    • 3. Heat oil in a pan, add mustard seeds and asafoetida.
    • 4. Sauté onions, tomatoes, and turmeric powder until soft.
    • 5. Add the cooked moong dal and water. Once the mixture boils, stir in the semolina or quinoa.
    • Cook until thickened.

    Why It’s Healthy:

    Sprouted moong dal is an excellent source of plant-based protein and is easy to digest.

    6. Cauliflower Rice Upma

    For a low-carb option, replace traditional grains with cauliflower rice.

    Ingredients:

    • 2 cups cauliflower rice –
    • 1 tablespoon oil –
    • 1 teaspoon mustard seeds –
    • 1 teaspoon urad dal –
    • 1 green chili, chopped –
    • 1 medium onion, chopped –
    • ½ cup diced vegetables (carrot, beans, peas) –
    • Curry leaves and coriander leaves for garnish-
    • Salt and black pepper to taste.

    Preparation:

    • 1. Dry roast the cauliflower rice in a pan for 2–3 minutes to remove excess moisture.
    • 2. Heat oil in a pan. Add mustard seeds and urad dal. Let them crackle.
    • 3. Sauté onions, green chilies, and curry leaves until translucent.
    • 4. Add the diced vegetables and cook until tender.
    • 5. Stir in the cauliflower rice, add salt and pepper, and cook for another 3–5 minutes.

    Why It’s Healthy:

    Cauliflower rice is a low-carb and high-fiber alternative, making it ideal for those on keto or calorie-restricted diets.

    Tips to Enhance the Healthiness of Upma recipe

    • Add nuts and seeds: Toss in almonds, cashews, or flaxseeds for added crunch and nutrients.
    • Use less oil: Healthy fats like olive oil or coconut oil can be used.
    • Add greens: Spinach, kale, and other leafy greens will increase the fiber and vitamin content.
    • Spice it up: Turmeric, black pepper, and ginger are not only great flavorings but also good for your health.

    Final Thoughts

    upma recipe is an easily adjustable dish that fits almost every person’s dieting need, whether one prefers it to be gluten-free, low in carbs, or loaded with protein. There are upma recipe six different preparations that give mouthwatering and nutritious choices to meet every person’s needs, so here goes making some of them for a healthier start.

    Try these 10 Creative ways reuse your old clothes This winter season

    0

    As the temperatures drop and winter is in, it is the right time to give old clothes a new life. Reusing old clothes not only saves money but also contributes to sustainable living by reducing waste. Here’s a comprehensive guide on how to creatively reuse and upcycle your old clothes to stay warm and stylish this winter.

    10 Amazing and aesthetic ways to reuse old Clothes

    1. Repurpose Old Sweaters

    Old clothes are winter staples that can easily be transformed into other useful items: –

    • Sweater Mittens and Gloves: Cut up the sleeves of old sweaters to make warm mittens or gloves. Sew together mitten-shaped pieces, and line them with fleece for added insulation.
    • Cozy Beanies and Headbands: Turn a sweater’s torso into a stylish beanie or a warm headband for outdoor activities.
    • Throw Pillow Covers: Upcycle an oversized sweater into a decorative and cozy pillow cover to add warmth to your living space.

    2. Transform Jeans into Winter Accessories

    Denim is durable and versatile, making it perfect for winter projects:

    • Hot Water Bottle Covers: Protect your hands and maintain warmth by creating a denim cover for hot water bottles.
    • Reinforced slippers: Turn old jeans into indoor slippers with added fabric lining for warmth. These make perfect companions for chilly floors.
    • Quilted Throws: Sew old jeans together to create a patchwork quilt or blanket. Add a warm backing to make it perfect for winter nights.

    3. Layer and Revamp Old Jackets

    Sometimes, old jackets lose their appeal but still offer plenty of warmth:

    • Add Patches and Embellishments: Use fabric scraps, embroidery, or iron-on patches to refresh the look of an outdated jacket.
    • Line with Fleece or Wool: If your old jacket isn’t warm enough, line it with fleece or wool fabric to increase insulation.
    • Create a New Vest: Remove the sleeves of a jacket to make a stylish, layered vest that pairs well with sweaters and turtlenecks.

    4. Upcycle T-Shirts for Layering

    Lightweight and versatile, T-shirts can be great layering pieces for winter:

    • Thermal Inner Layers: Sew two old T-shirts together with a layer of fleece or thermal fabric in between to create a DIY thermal shirt.
    • Infinity Scarves: Cut and sew strips of old T-shirts into colorful, lightweight infinity scarves for layering.
    • Leg Warmers: Utilize the bottom half of T-shirts to make basic leg warmers. These can be worn under jeans or leggings for added warmth.

    5. Turn Old Clothes into Home Comforts

    When the cold hits, nothing is quite as comfortable as a warm, welcoming home.

    • Draft Stoppers: Fill fabric tubes made from old clothes with rice or dried beans to create draft stoppers for windows and doors.
    • Rag Rugs: Braided or knotted rag rugs made from old clothes can add warmth to your floors.
    • Blankets and Throws: Combine various old clothes to sew a quilt or throw blanket, perfect for snuggling on winter evenings.

    6. DIY Winter Décor from Old Fabrics

    Bring festive cheer to your home using old clothes:

    • Fabric Garlands: Cut old clothes into strips and tie them into garlands to decorate your home.
    • Stockings: Create personalized Christmas stockings from old fabrics. Add buttons or lace for unique touches.
    • Fabric Ornaments: Sew small, stuffed shapes like stars, snowflakes, or hearts to hang on your tree.

    7. Breathe New Life into Shoes and Boots

    Breathe new life into your footwear with fabric from old clothes:

    • Boot Liners: Use fleece or sweater material to create cozy liners for your boots.
    • Personalized Boot Covers: Make fashionable covers from old clothes to cover your boots with winter slush.

    8. Make Pet Accessories

    Old clothes

    Make this winter, not forget about your pet.

    • Pet Sweaters: Get old sweaters and make your pet warm winter wear.
    • Pet Bed: Stuff with old clothes to make bed for pet so that pet does not feel cold in winter.

    9. Donate or Swap

    If you find that there are some clothes that are way beyond your personal use but still wearable:

    • Clothing Swaps: Organize a swap event where friends and family can exchange winter clothes they no longer need.
    • Donate: Donate old winter clothes to shelters or charitable organizations to help those in need.

    10. Craft Gift Items

    Use your sewing or crafting skills to make thoughtful gifts:

    • Handmade Scarves and Gloves: Turn old fabric into stylish accessories for loved ones.
    • DIY Pouches or Bags: Repurpose denim or sturdy materials into bags or pouches.
    • Fabric Book Covers: Sew reusable book covers from colorful old clothes.

    Conclusion

    Reusing old clothes for winter saves money, reduces environmental impact, and opens the doors to creativity as one can make cozy accessories and functional home décor. A little creativity and effort go a long way in keeping one warm, stylish, and sustainable this winter. Gather those old clothes and start crafting!

    FAQs About Reusing Old Clothes for Winter

    1: How do I ensure old clothes are clean and safe to repurpose?

    Wash all old clothes thoroughly with a disinfectant detergent before repurposing. For delicate fabrics, use a gentle cycle or hand wash. If dealing with stains, pre-treat them using baking soda or vinegar. Ensure clothes are completely dry before cutting or sewing.

    2: Can I reuse clothes without sewing skills?

    Absolutely! So many projects like making scarves, draft stoppers, or fabric garlands can be done with no or very little sewing. Fabric glue, safety pins, or tying methods are often used for easy creations.

    3: How do I make repurposed clothes look fashionable?

    Embellish repurposed items with embroidery, iron-on patches, or fabric paint to give them a personal style. You can also combine different colors or patterns to create unique designs that mirror your personality.